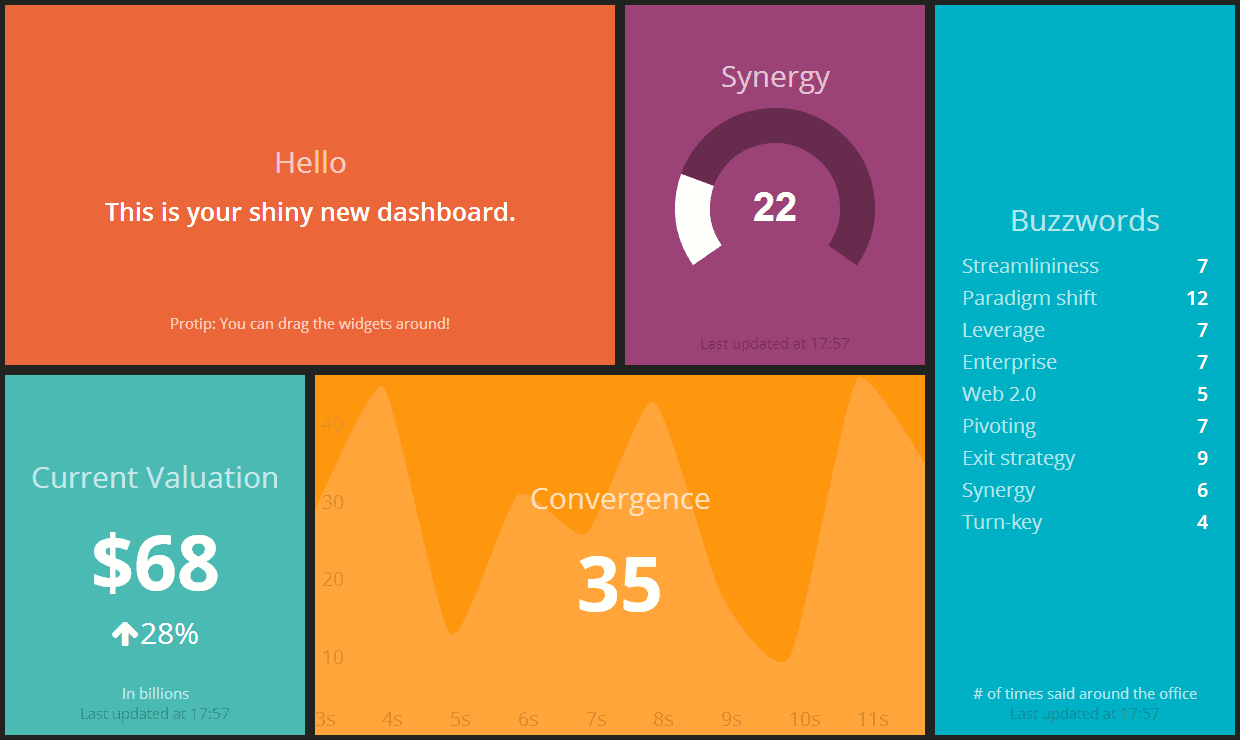
 The fourth post in a series for building an information radiator using the raspberry pi, it outlines how I built a Dashing-based dashboard using a raspberry pi and a blank SD card from my Windows 7 x64 machine, using Cygwin.
Installing Raspbian
Before I could do anything, I needed to install an operating system on the SD card for the pi. I chose to use raspbian, but decided to use a raw image instead of NOOBS. For my needs, the extra splash screen and slightly longer boot delay weren't worth it.
Downloading The Image
The first step was downloading the disk image. I got the latest raspbian image using the following:
$ wget http://downloads.raspberrypi.org/raspbian/images/raspbian-2014-01-09/2014-01-07-wheezy-raspbian.zip
I used windows explorer to extract the .img file (you can use your tool of choice, of course).
Identifying the Flash Drive Under Cygwin
If you are using Linux, OS X or plain Windows, you can just follow the image installation instructions on the raspberry pi site. However, since I preferred using the Linux-style disk dump (dd) tool under Windows, I needed to determine what Cygwin device corresponded to my physical flash drive.
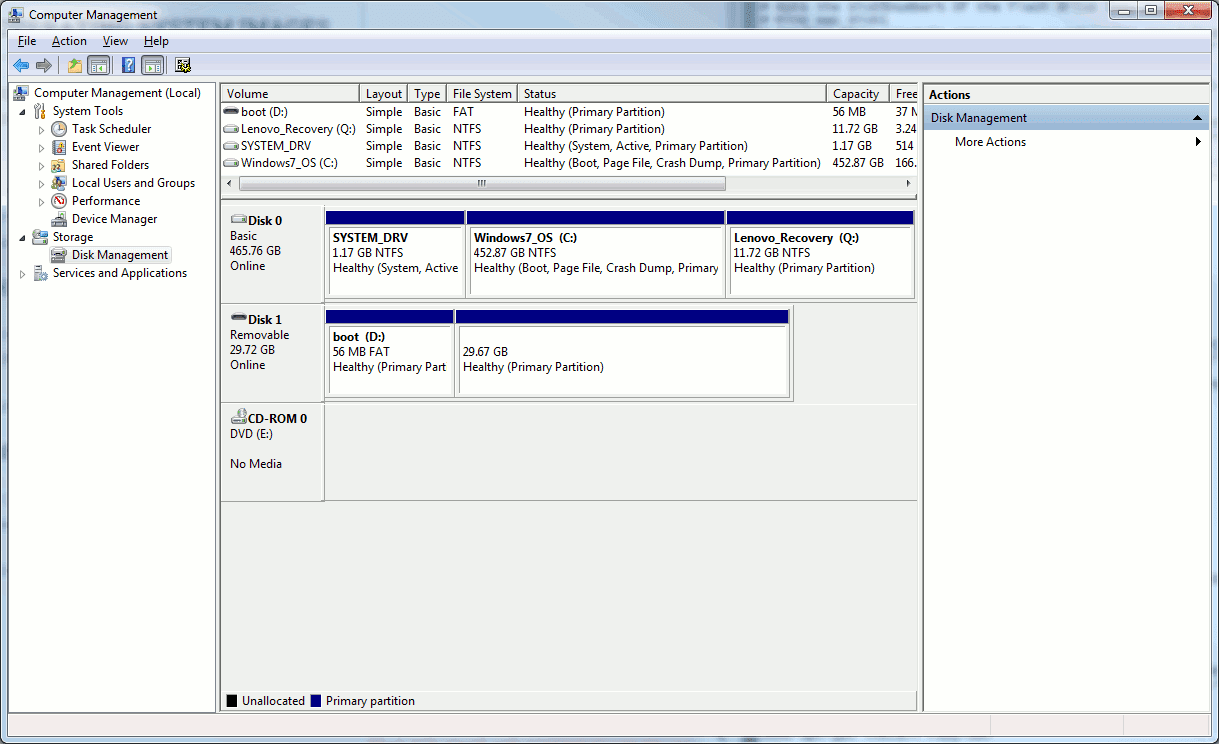
 First, I inserted the disk into the flash reader of my machine. Windows informed me that it couldn't read the device format (my disk was not formatted) and asked whether I wanted to scan and fix it. I declined, since it wouldn't have found a Windows file system and I'm trying to overwrite the disk with a Linux file system anyway. To see which disk I needed to find, I right-clicked 'My Computer', and selected 'Manage...'. I opened the disk manager by selecting 'Disk Management' under 'Storage' on the tree view to the left. I noted that Windows labelled this as 'Disk 1', and I noted the partitions (the Flash drive had 2, my primary drive had 3).
Next, I read how Cygwin names the drives and it appeared that the Windows 'Disk 1' was going to be Cygwin's /dev/sdb. To reduce the risk of accidentally destroying my laptop's operating system by writing to my primary drive, I looked at /proc/partitions to see that /dev/sdb only had one Windows partition (/dev/sda had three, so it was obviously my primary drive).
 $ cat /proc/partitions
 major minor #blocks name
   8   0   488386584 sda <=== Disk 0
   8   1     1228800 sda1
   8   2   474867708 sda2
   8   3    12288000 sda3
   8   16   31166976 sdb <=== Disk 1 (Flash Drive)
   8   17      57344 sdb1
Writing The Image To The Flash Drive
With confidence that I was writing to the correct disk by using /dev/sdb, I ran the following command to write the raspbian disk image directly to the drive:
$ dd bs=1M oflag=direct if=2014-01-07-wheezy-raspbian.img of=dev/sdb
I then "safely removed" the flash disk using the normal Windows procedure to ensure everything was flushed to disk. I then removed the Flash media from my laptop's reader, inserted the it back into my raspberry pi and powered it up to boot into raspi-config.
Configuring the Raspberry Pi
Once the device had booted into raspi-config, I configured the device.
Expand the Root File System
The first thing I did was to expand the root file system. NOOBS does this automatically, but when not using it, running this is necessary to have raspbian's root filesystem use the entire Flash drive's storage capacity.
Change the Pi User's Password
So that I can manage the pi remotely, I changed the pi user's default password. I simply selected 'Change User Password', entered and confirmed an alternative password.
Set Locale, Time Zone and Keyboard
I selected 'Internationalisation Options' then 'Change Locale' and added 'en.US UTF-8'. Then I used this setting to replace the default 'en.GB'. I then selected 'Change Timezone' and set the time zone to US/Eastern.
Advanced Options: SSH and Hostname
Finally, under 'Advanced Options' I selected 'Hostname' and set the name of the device to something better than the default. I then enabled remote ssh access by selecting 'SSH' and selecting 'Enable'.
Fixing the Video Output
On my television, a Vizio E320VL, the video output didn't use the entire screen. At first, I thought this was a resolution issue and I used the tvservice commands to set the resolution manually. However, after running the following I determined that it wasn't related to the resolution:
  # Dump the television's device identification data
 $ tvservice -d edid.dat
 Written 256 bytes to edid.dat
# Parse and display the television's data
$ edidparser edid.dat
Enabling fuzzy format match...
Parsing edid.dat...
HDMI:EDID monitor name is E320VL
HDMI:EDID found preferred CEA detail timing format: 1920x1080p @ 60 Hz (16)
...
HDMI:EDID preferred mode remained as CEA (16) 1920x1080p @ 60 Hz with pixel clock 148 MHz
HDMI:EDID has HDMI support and audio support
edid_parser exited with code 0 # Output the current display settings
$ tvservice -s
state 0x12001a [HDMI CEA (16) RGB lim 16:9], 1920x1080 @ 60Hz, progressive
Here I determined that the preferred and actual settings were correct at 1080p. I then tried disabling overscan by editing /boot/config.txt to have the following:
 ##
 # To use the entire screen on the Vizio
 ##
 disable_overscan=1
After restarting, I was happy to see the output use the entire screen.
Updating Packages
So that I didn't have to worry about outdated packages, I decided to update them before continuing.
I had problems updating with the gigantic wolfram-engine package. Since I won't be using it, I removed it by running the following:
Removing Wolfram Engine
I had problems updating with the gigantic wolfram-engine package. Since I won't be using it, I removed it by running the following:
 # Wolfram failed to upgrade due to space before, so I removed it
 $ sudo apt-get remove wolfram-engine
 $ sudo apt-get autoremove
Upgrading The Packages
Once I was sure that the upgrade would succeed, I upgraded the packages:
 # Upgrade packages using apt
 $ sudo apt-get update
 $ sudo apt-get dist-upgrade
After this was done, I was ready to install Dashing.
Installing Dashing
Following the 'Getting Started' instructions from the Dashing site, I ran the following:
 # Install shopify's Dashing (with verbose to see progress)
 $ sudo gem install dashing -V

 ERROR: Error installing dashing:
     ERROR: Failed to build gem native extension.
...
 /usr/lib/ruby/1.9.1/rubygems/custom_require.rb:36:in `require': cannot load such file -- mkmf (LoadError)
     from /usr/lib/ruby/1.9.1/rubygems/custom_require.rb:36:in `require'
Doing a quick google search, I found that this is caused by tools missing for ruby development. Raspbian doesn't come with the ruby-dev package installed, so I installed it:
 # Need to install ruby-dev
 $ sudo apt-get install ruby-dev
I then re-ran the gem install command and it completed successfully. It did take a noticeably long time, which I presume was spent using the dev tools to compile for the raspberry pi's ARM processor.
Creating and Running a Dashboard
After dashing was installed, I continued the 'Getting Starting' instructions by creating my own dashboard:
 # Create a 'Dashing' dashboard
 $ dashing new dashboard
That completed successfully under the subdirectory 'dashboard', so I continued to try and bundle it:
 # Bundle the dashboard application
 $ cd dashboard
 $ bundle
However, the bundle command was not installed. So, I installed it:
 # Install bundler (raspbian has package through apt)
 $ sudo apt-get install bundler
After installing bundler, I was able to successfully re-run the bundle command. I then tried running the dashboard using the final 'Getting Started' command, but got the following error:
 # Try to start my dashboard
 $ dashing start
 /var/lib/gems/1.9.1/gems/execjs-2.0.2/lib/execjs/runtimes.rb:51:in `autodetect': Could not find a JavaScript runtime. See https://github.com/sstephenson/execjs for a list of available runtimes. (ExecJS::RuntimeUnavailable)
     from /var/lib/gems/1.9.1/gems/execjs-2.0.2/lib/execjs.rb:5:in `<module:ExecJS>'
     from /var/lib/gems/1.9.1/gems/execjs-2.0.2/lib/execjs.rb:4:in `<top (required)>'
 ...
The problem was a missing JavaScript runtime, necessary for running the server-side coffeescript code. So that I didn't have to compile V8 for the raspberry pi's ARM architecture, which takes a long time, I decided to just install the raspbian node.js package:
 # Installing therubyracer takes forever on the pi, using nodejs instead...
 $ sudo apt-get install nodejs
I then re-ran dashing start again and it successfully started up on port 3030. To verify that everything was working I accessed it remotely using a web browser by accessing: http://<raspberrypi-host>:3030/.
This lays the foundation for developing the dashboard, now all one has to do is to customize the widgets and configure the raspberry pi to boot into the dashboard.

No comments:
Post a Comment