Wednesday, October 14, 2015

Mount partitions from RetroPie (or any Linux) disk images

Once upon a time, I built a working retro console with a large number of Atari, NES, TurboGrafx 16, Genesis and SNES titles using the Raspberry Pi B+ and it worked great. It performed well except for a few games that  you could tell were taxing the hardware just by listening to the choppy audio. When the Pi 2 came out I immediately began porting my custom build to it. Short on time, I optimistically decided I would try a short cut and just try to perform an upgrade using apt. It failed and left me stuck with a snowflake build that wouldn't work on the original system or the new one. Nice work.

Salvaging the rig


With the system broken and other constraints on my time, I let it rest in peace. I had the disk and knew that all of my ROMs and metadata were intact in some form. The upgrade made it so booting would cause a kernel panic. I also couldn't just fetch the metadata because it was not in the XML format readable by the version of EmulationStation bundled by the stock RetroPie project, it was in sqlite since I was using my own custom build. Due to the amount of time I put into scraping multiple games databases, fixing metadata and manually testing the ROMs,  the premise of having to do even a fraction of that again depressed me to the point that I didn't want to even look at the dead device. Then, someone that had witnessed the rig in its working condition asked me if they could borrow it for an event they were having - in two days.

Nothing can motivate you quite like a clear objective and an unmovable timeline. Faced with the simple question Can I get this working again in a day?, I got my laptop out and started to map out how I could get things working again. It was simple:
  • Install the stock version of RetroPie for the Pi 2's architecture
  • Build the custom version of EmulationStation on-device so I can read the game metadata
  • Migrate the ROMs and metadata from the original game disk
  • Start it up and play games!
After downloading the RetroPie image for the Pi 2, I saved the contents of the original Micro SD card using dd. After doing that, I wrote the RetroPie image to that same disk, again using dd. I booted the system to confirm that I had a working system on the Pi 2. I then tweaked the RetroPie scripts for building EmulationStation to use my github fork/branch and built it. Now I just had to migrate the ROMs and metadata. The problem is that I didn't have another disk and I dumped the entire image, I didn't just dump the root partition.

Loopback to the rescue!


I had a suspicion that I could just use the loopback file system support to mount the partitions directly from the image. I just didn't know how to do that from a raw image. Let's cut to the chase:

After mounting the partition, I was able to simply copy over the files from the image directly to the Micro SD card. Lovely, thank you Linux.

Tuesday, December 16, 2014

Configuring colbertix on EC2

With Stephen Colbert scheduled to take over for David Letterman as the host of The Late Show soon and The Colbert Report winding down to its conclusion in a few days, I was not surprised when someone contacted me regarding colbertix, my program to automatically get tickets to The Colbert Report.

The user was attempting to configure and run the program, but having some problems. After a few rounds of bouncing emails back and forth it became evident that we were not converging on a solution quickly. Because the user sent me their configuration file and because it is the only input the program requires, I offered to configure an instance for them on Amazon EC2. I was successful and as as result the user received two tickets to one of the show's final recordings. The following describes the steps I used to run the program on EC2, which uses Chromium and Selenium with a virtual X server on Ubuntu 14.04 LTS. The micro instances are free of charge, as is the colbertix program so this allows you to get tickets to one of the final Colbert Report shows for free.

Configuring the instance


To start, I created a free-tier para-virtualized micro instance based on Ubuntu 14.04 LTS:


Then, I chose a micro instance:


I left the instance configuration at the default settings:


I also left the storage settings at the default:


I then named my instance with a memorable name:


I then configured a custom security group that would only allow SSH connections from my network address:


The final step was then just to launch the instance:


Connecting to the instance over SSH


In order to complete the installation and run the program, I needed to connect to the instance. To do this, I first needed to generate an SSH key pair. To do this, I clicked the Connect button after selecting my newly created instance:


This shows a popup that asks to use an existing or create a new key pair. Since I do not have an existing key pair, I entered a name for a new one and pushed the Download Key Pair button:


Once this is done, another popup shows that describes how to use the downloaded key pair to connect to the instance over SSH. 


After performing the steps described, I was able to connect to the instance and now could proceed with the steps for installing and running colbertix.

Installing required packages


Before attempting the colbertix installation, I needed to install a few requisite packages. The packages were:
  • python-pip - the python package installer
  • git - required to clone the colbertix project from github
  • chromium-browser - the open source web browser, required for interacting with the website
  • chromium-chromedriver - the driver required to programatically control the browser
  • xvfb - the X virtual framebuffer, required to run graphical applications without a display
To do this, I issued the following two commands at the instance's command prompt:


Fixing Chromium's Chromedriver


After the required packages were installed, I had to fix the installation of chromium-chromedriver. The shared libraries for chromium need to be made available to the chromedriver, or it fails with an error. To do this, you simply need to perform the following:


Install and verify colbertix installation


Before configuring and running colbertix, I ran the automated test suite to ensure that there weren't any problems with the environment.


Configure and run colbertix


After seeing that all tests passed, I knew I could configure and run the program. To configure the program, I simply copied the example config file, config.ini-example, to config.ini in the same directory.

You should configure all values, even repeating the phone number if necessary, to ensure the program will be able to register successfully. If you don't have blackout dates, you can set the bad_dates: option to be empty, but do not remove the option name. When you are finished editing, config.ini should look something like the following:


Once you have a valid config file, you can start the colbertix bot. You will want to be able to disconnect from your instance and leave it running. To do this, I used screen like so:

Once you have done this, the colbertix program will attempt to register for the first available set of tickets that matches your configuration. If it succeeds, you will receive an email from the Colbert Report registration system asking you to confirm. If for some reason the registration fails, a screenshot will be saved to the project directory so you can inspect the screen.

When you are finished and have your tickets, you can go into the EC2 console and terminate the instance.

Good luck getting tickets and enjoy the show!

Thursday, October 23, 2014

JVM thread dumps by using kill

Today I learned something new, courtesy of an interview question from a prominent tech company. If you ever wanted to know how to get stack traces for all threads and summary information of a running JVM under Linux, you can do it with nothing but the familiar kill command. By sending the QUIT signal to the JVM process, it will print information like the following to the console:


Wednesday, September 24, 2014

Unprivileged servers over standard ports on the Raspberry Pi

Sometimes you want to be able to run network services on standard ports, but as unprivileged users. I encountered this while attempting to configure my Raspberry Pi as an easy-to-use checkers game server. The following describes how I used port forwarding via iptables to achieve this.

I wanted users to be able to access a HTML5 checkers game client simply by entering just the host name of the server into a web browser, and not hostname:port-number. This meant I needed my nodejs server to accept and serve connections on TCP port 80. However, code running as unprivileged users can only bind to ports above 1024. Rather than running the nodejs server as a privileged user, and opening the server up to more security vulnerabilities, I decided to use iptables to redirect traffic from the standard port (80) to my non-standard one (3000).

To do this on the pi, you need to:
  • Add the following to the bottom of /etc/network/interfaces:
  • Add our rules to /etc/network/iptables:
The above filter rules are minimal, and you'll probably need to augment them with additional services like ssh (port 22).

The *filter and *nat sections are actually different tables. The filter rules are intended for packet filtering, and the nat rules are for doing Network Address Translation (or NAT). The rule that rewrites the network packets, effectively redirecting the traffic for port 80 to port 3000 and back again is:

A number of articles say that you need to enable IP forwarding for the network interfaces, either via the proc filesystem or by using sysctl. However, I did not find this necessary. Despite sysctl and proc net forwarding being disabled, this iptables redirect functioned properly.

Also, it is worth noting that by default the iptables commands only show rules in the *filter table. This lead me to believe that my rules were not applied when they were. To see rules in tables other than *filter, you need to use the -t <table> option. For example, to list all rules in the nat table, you would issue:

Running a recent version of nodejs on the Raspberry Pi

While attempting to get my checkers network server and the accompanying nodejs-based web application for spectating and playing checkers games running on the Raspberry Pi, I quickly ran into trouble. My Raspberry Pi is running Raspbian, and the nodejs package delivered through APT is ancient 0.6.x.

I developed against nodejs 0.10.25, since that is the latest version of the package for Ubuntu 14.04.1 LTS, the OS I'm running on my laptop. I tried porting the application to the earlier versions, but it quickly turned into a nightmare with library dependencies constantly breaking. I decided it would be better if I could just install the same version of nodejs I developed on.

I found many instructions for how to install nodejs on the Raspberry Pi, but a number of them had you adding third-party APT repositories or grabbing third-party package files. These instructions may, and probably do, work just fine. However, I wanted to skip all the third-parties and get nodejs from the source. Fortunately, this was extremely simple.

Nodejs distributes builds for the Raspberry Pi. Installing the exact version I developed on was as simple as:

The only difference I found, once installed, is that the node executable is called node and not nodejs. However, the NPM executable is still named npm.

Tuesday, April 29, 2014

Raspberry Pi Information Radiator: Building The Dashboard

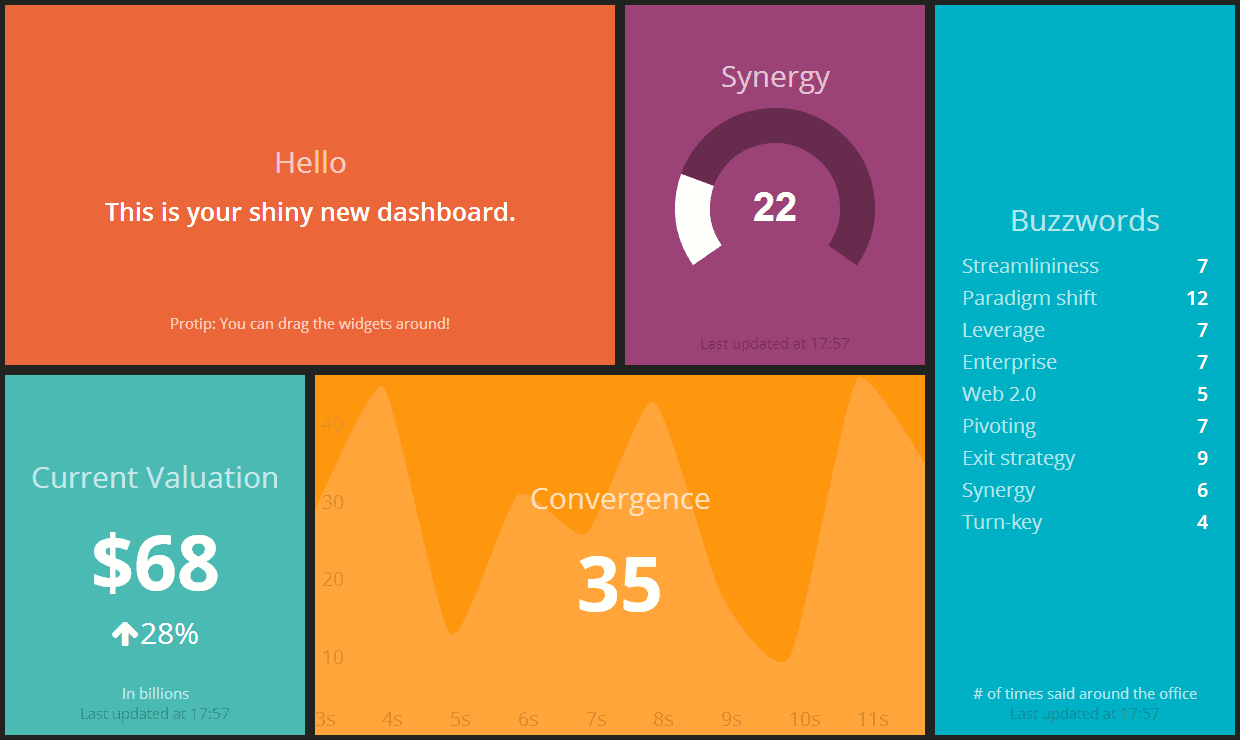
The fifth and final post in a series for building an information radiator using the raspberry pi, it describes how to take the working Dashing dashboard from last time and customize it for our own purposes. I briefly outline the basics of populating a dashboard with widgets and jobs and discuss issues specific to running dashing on the raspberry pi.

Widget Basics


The dashing website describes the basics of a widget in detail. Essentially, a widget is defined using three files: a small amount of html specifying data bindings for the delivered data, style information in a SASS scss file, and event handling code in coffeescript. Once a widget is defined, instances can be created by editing the dashboard's ERB file. You just create a div with a data-view attribute matching a widget's class name and a data-id that is used to route data to the widget. Data can be pushed to the widgets by submitting an HTTP POST to /widgets/<data-id> from an external job or application, or can be pulled using Dashing's job support. The web site describes how to get data into your widgets in more detail. 

Installing Widgets


Because widgets are usually just three files (or four with a job), Dashing comes with the ability to install the necessary files from a GitHub Gist. The installer uses the file extensions of the files of the gist to tell whether the file should be placed under widgets/ or jobs/, as you can see from the Dashing source code. You do this by using the 'install' command followed by the gist id of the widget. For example, the asana tasks gist is https://gist.github.com/willjohnson/6334811 or gist 6334811. To install the widget, we run:

 $ dashing install 6334811  
    create widgets/asana_tasks/asana_tasks.coffee  
    create widgets/asana_tasks/asana_tasks.html  
    create jobs/asana_tasks.rb  
    create widgets/asana_tasks/asana_tasks.scss  
 Don't forget to edit the Gemfile and run bundle install if needed. More information for this widget can be found at https://gist.github.com/6334811  

As you can see, the command installs the files in the proper places and instructs you to continue with other widget-specific installation steps manually. Note that this does not add the widget to a dashboard. It only installs the widget as an available type. You still have to edit your dashboard ERB file to include a widget of the appropriate data-view type and data-id for the job.

Widget Declaration and Layout


Once the widget is installed, we can include it in our dashboard. We simply edit the dashboard ERB file under dashboards/ to include something like the following:

   <li data-row="1" data-col="3" data-sizex="1" data-sizey="2">  
    <div data-id="asana_tasks" data-view="AsanaTasks" data-title="Today's Tasks"></div>  
    <i class="icon-check icon-background"></i>  
   </li>  

As previously mentioned, the important parts for the widget definition are the data-id and data-view. These relate the div to the data event name and widget type, respectively. You can see here that you can also provide data to the widget directly by specifying it with a data- prefix. Here, the title of the widget is set directly rather than using data from a data event.

The li element is to specify how to layout the widget, these inform the location and size of the widget in the dashboard. The data-row and data-col attributes specify the cell that the widget's upper-left corner will be start in. The data-sizex and data-sizey attributes specify the width and height of the widget in grid cells. You can read more about how to position widgets from the Dashing site.


Further Customizations


Armed with the basics, you can create a dashboard customized specifically for your needs. However, I ran into a few issues I feel warrant additional treatment. Some are specific to running on the raspberry pi.

Separating Configuration from Source Code


The first issue I wanted to address was removing the somewhat sensitive information like API tokens and authentication credentials from source control. I found that the widgets typically didn't bother doing this. However, I wanted to publish the complete development history of my dashboard, so I needed to address this up front. I ended up using the dotenv gem to put settings into the ENV array. I then just changed the widgets to use ENV[setting] rather than hard-coding the setting directly in code.

I did run into one snag with this approach. Initially, I loaded the environment directly in the rackup file, config.ru. However, I found this did not load the settings into ENV in time for all the necessary code. Specifically, jobs that referenced ENV outside of the scheduled routines could not see their settings. Looking at the source code, I found that Dashing loads files under lib/ before it loads the jobs. By putting the environment initialization in a file under lib, settings were loaded and accessible as I initially expected. 

Installing Native Gems Through APT


Another snag I ran into was that certain ruby gems needed native extensions. Since these are architecture dependent they need to be compiled for the raspberry pi's ARM processor. While it eventually worked, the time it took to install was extremely long. I found that I didn't have to do this. Raspbian includes packages for certain common ruby packages. Before installing gems that a widget requires through gem install or bundler try installing it through APT first. For example, I installed nokogiri directly like so:

 $ sudo apt-cache search nokogiri  
 libnokogiri-ruby - Transitional package for ruby-nokogiri  
 libnokogiri-ruby1.8 - Transitional package for ruby-nokogiri  
 libnokogiri-ruby1.9 - Transitional package for ruby-nokogiri  
 libnokogiri-ruby1.9.1 - Transitional package for ruby-nokogiri  
 ruby-nokogiri - HTML, XML, SAX, and Reader parser for Ruby
$ sudo apt-get install libnokogiri-ruby
... 

Slow CSS Transitions


Finally, I found that many of the widgets used CSS3 transitions to make the widgets look more visually appealing. However, these transitions did not render well on the raspbery pi. Instead of looking smooth and visually appealing, they often just delayed the widget from showing up quickly. I ended up modifying the offending widgets to not using transitions.

Summary


That about covers the basics and a few snags you might encounter while developing a dashboard for the raspberry pi. I have made the complete source code for my own dashboard available on my github account. Have fun developing your own!

Tuesday, April 22, 2014

Raspberry Pi Information Radiator: From Zero to Dashing


The fourth post in a series for building an information radiator using the raspberry pi, it outlines how I built a Dashing-based dashboard using a raspberry pi and a blank SD card from my Windows 7 x64 machine, using Cygwin.

Installing Raspbian


Before I could do anything, I needed to install an operating system on the SD card for the pi. I chose to use raspbian, but decided to use a raw image instead of NOOBS. For my needs, the extra splash screen and slightly longer boot delay weren't worth it.

Downloading The Image


The first step was downloading the disk image. I got the latest raspbian image using the following:

 $ wget http://downloads.raspberrypi.org/raspbian/images/raspbian-2014-01-09/2014-01-07-wheezy-raspbian.zip  

I used windows explorer to extract the .img file (you can use your tool of choice, of course).

Identifying the Flash Drive Under Cygwin


If you are using Linux, OS X or plain Windows, you can just follow the image installation instructions on the raspberry pi site. However, since I preferred using the Linux-style disk dump (dd) tool under Windows, I needed to determine what Cygwin device corresponded to my physical flash drive. 

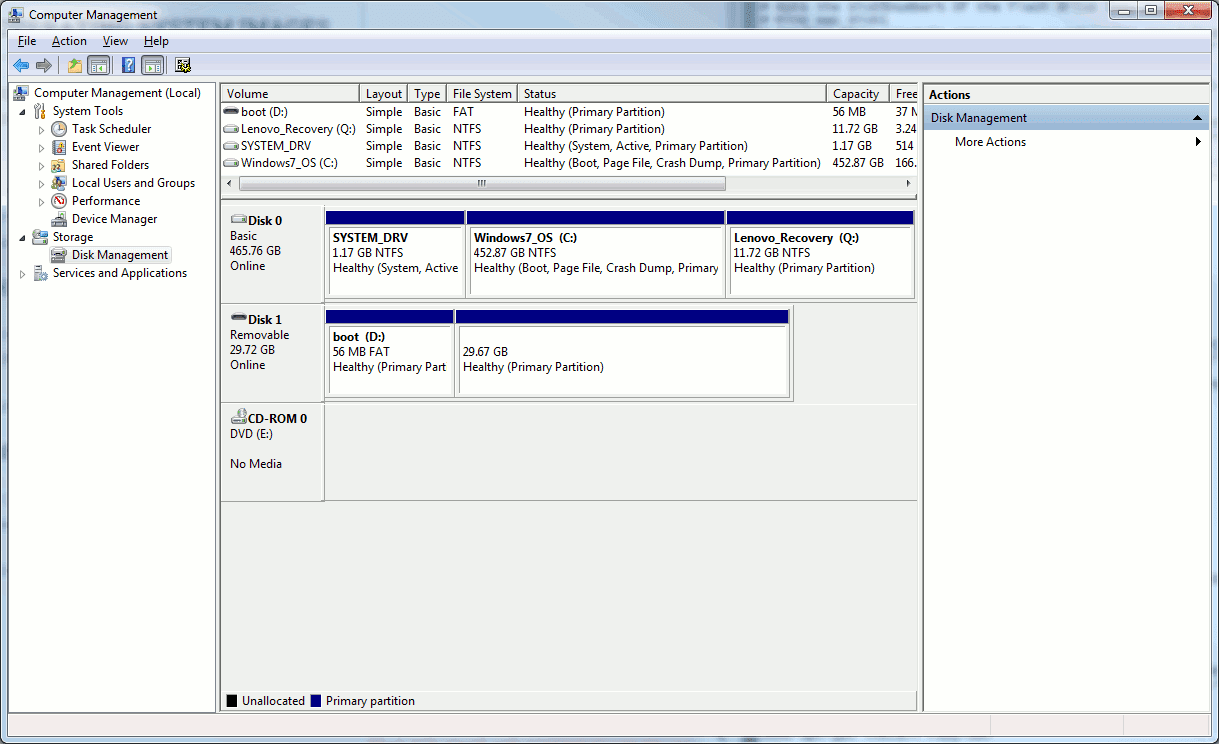
First, I inserted the disk into the flash reader of my machine. Windows informed me that it couldn't read the device format (my disk was not formatted) and asked whether I wanted to scan and fix it. I declined, since it wouldn't have found a Windows file system and I'm trying to overwrite the disk with a Linux file system anyway. To see which disk I needed to find, I right-clicked 'My Computer', and selected 'Manage...'. I opened the disk manager by selecting 'Disk Management' under 'Storage' on the tree view to the left. I noted that Windows labelled this as 'Disk 1', and I noted the partitions (the Flash drive had 2, my primary drive had 3).

Next, I read how Cygwin names the drives and it appeared that the Windows 'Disk 1' was going to be Cygwin's /dev/sdb. To reduce the risk of accidentally destroying my laptop's operating system by writing to my primary drive, I looked at /proc/partitions to see that /dev/sdb only had one Windows partition (/dev/sda had three, so it was obviously my primary drive).

 $ cat /proc/partitions   
 major minor #blocks name  
   8   0   488386584 sda <=== Disk 0
   8   1     1228800 sda1  
   8   2   474867708 sda2  
   8   3    12288000 sda3  
   8   16   31166976 sdb <=== Disk 1 (Flash Drive)
   8   17      57344 sdb1  
   

Writing The Image To The Flash Drive


With confidence that I was writing to the correct disk by using /dev/sdb, I ran the following command to write the raspbian disk image directly to the drive:

 $ dd bs=1M oflag=direct if=2014-01-07-wheezy-raspbian.img of=dev/sdb   

I then "safely removed" the flash disk using the normal Windows procedure to ensure everything was flushed to disk. I then removed the Flash media from my laptop's reader, inserted the it back into my raspberry pi and powered it up to boot into raspi-config.

Configuring the Raspberry Pi


Once the device had booted into raspi-config, I configured the device. 

Expand the Root File System


The first thing I did was to expand the root file system. NOOBS does this automatically, but when not using it, running this is necessary to have raspbian's root filesystem use the entire Flash drive's storage capacity.

Change the Pi User's Password


So that I can manage the pi remotely, I changed the pi user's default password. I simply selected 'Change User Password', entered and confirmed an alternative password.

Set Locale, Time Zone and Keyboard


I selected 'Internationalisation Options' then 'Change Locale' and added 'en.US UTF-8'. Then I used this setting to replace the default 'en.GB'. I then selected 'Change Timezone' and set the time zone to US/Eastern.

Advanced Options: SSH and Hostname


Finally, under 'Advanced Options' I selected 'Hostname' and set the name of the device to something better than the default. I then enabled remote ssh access by selecting 'SSH' and selecting 'Enable'.

Fixing the Video Output


On my television, a Vizio E320VL, the video output didn't use the entire screen. At first, I thought this was a resolution issue and I used the tvservice commands to set the resolution manually. However, after running the following I determined that it wasn't related to the resolution:

  # Dump the television's device identification data  
 $ tvservice -d edid.dat   
 Written 256 bytes to edid.dat   
 # Parse and display the television's data  
 $ edidparser edid.dat    
 Enabling fuzzy format match...   
 Parsing edid.dat...   
 HDMI:EDID monitor name is E320VL   
 HDMI:EDID found preferred CEA detail timing format: 1920x1080p @ 60 Hz (16)   
 ...   
 HDMI:EDID preferred mode remained as CEA (16) 1920x1080p @ 60 Hz with pixel clock 148 MHz   
 HDMI:EDID has HDMI support and audio support   
 edid_parser exited with code 0   
 # Output the current display settings  
 $ tvservice -s   
 state 0x12001a [HDMI CEA (16) RGB lim 16:9], 1920x1080 @ 60Hz, progressive   

Here I determined that the preferred and actual settings were correct at 1080p. I then tried disabling overscan by editing /boot/config.txt to have the following:

 ##  
 # To use the entire screen on the Vizio  
 ##  
 disable_overscan=1  

After restarting, I was happy to see the output use the entire screen.

Updating Packages


So that I didn't have to worry about outdated packages, I decided to update them before continuing.

Removing Wolfram Engine


I had problems updating with the gigantic wolfram-engine package. Since I won't be using it, I removed it by running the following:

 # Wolfram failed to upgrade due to space before, so I removed it  
 $ sudo apt-get remove wolfram-engine  
 $ sudo apt-get autoremove  

Upgrading The Packages


Once I was sure that the upgrade would succeed, I upgraded the packages:

 # Upgrade packages using apt  
 $ sudo apt-get update  
 $ sudo apt-get dist-upgrade  

After this was done, I was ready to install Dashing.

Installing Dashing


Following the 'Getting Started' instructions from the Dashing site, I ran the following:

 # Install shopify's Dashing (with verbose to see progress)
 $ sudo gem install dashing -V  
   
 ERROR: Error installing dashing:  
     ERROR: Failed to build gem native extension.  
...
 /usr/lib/ruby/1.9.1/rubygems/custom_require.rb:36:in `require': cannot load such file -- mkmf (LoadError)  
     from /usr/lib/ruby/1.9.1/rubygems/custom_require.rb:36:in `require'  

Doing a quick google search, I found that this is caused by tools missing for ruby development. Raspbian doesn't come with the ruby-dev package installed, so I installed it:

 # Need to install ruby-dev  
 $ sudo apt-get install ruby-dev  

I then re-ran the gem install command and it completed successfully. It did take a noticeably long time, which I presume was spent using the dev tools to compile for the raspberry pi's ARM processor.

Creating and Running a Dashboard


After dashing was installed, I continued the 'Getting Starting' instructions by creating my own dashboard:

 # Create a 'Dashing' dashboard  
 $ dashing new dashboard  

That completed successfully under the subdirectory 'dashboard', so I continued to try and bundle it:

 # Bundle the dashboard application  
 $ cd dashboard  
 $ bundle  

However, the bundle command was not installed. So, I installed it:

 # Install bundler (raspbian has package through apt)  
 $ sudo apt-get install bundler  

After installing bundler, I was able to successfully re-run the bundle command. I then tried running the dashboard using the final 'Getting Started' command, but got the following error:

 # Try to start my dashboard  
 $ dashing start  
 /var/lib/gems/1.9.1/gems/execjs-2.0.2/lib/execjs/runtimes.rb:51:in `autodetect': Could not find a JavaScript runtime. See https://github.com/sstephenson/execjs for a list of available runtimes. (ExecJS::RuntimeUnavailable)  
     from /var/lib/gems/1.9.1/gems/execjs-2.0.2/lib/execjs.rb:5:in `<module:ExecJS>'  
     from /var/lib/gems/1.9.1/gems/execjs-2.0.2/lib/execjs.rb:4:in `<top (required)>'  
 ...

The problem was a missing JavaScript runtime, necessary for running the server-side coffeescript code. So that I didn't have to compile V8 for the raspberry pi's ARM architecture, which takes a long time, I decided to just install the raspbian node.js package:

 # Installing therubyracer takes forever on the pi, using nodejs instead... 
 $ sudo apt-get install nodejs  

I then re-ran dashing start again and it successfully started up on port 3030. To verify that everything was working I accessed it remotely using a web browser by accessing: http://<raspberrypi-host>:3030/.

This lays the foundation for developing the dashboard, now all one has to do is to customize the widgets and configure the raspberry pi to boot into the dashboard.